DIY Macrame Basket Tutorial (with handle)
An intermediate design that increases the difficulty level on the square knot. The basket only uses this type of knot, so once finished, you’ll be an expert on it!
If you’re new to macrame, it’s still possible to try this as a beginner, just learn how to make a square knot here first, and then come back to start your new project.
Let’s begin…

What you’ll need
3mm single twist cotton cord (40.4m)
Measuring tape
Fabric scissors
Cork board & pins (optional)
S hooks (optional)
The tutorial uses single twist cotton cord to give it an overall better aesthetic. You can of course use 3 ply cord if you prefer that type.
And since this is a DIY, you can choose whichever colour you want!
If you’ve purchased the kit, it will include precut cord and s hooks.
Make the Handle
Using fabric scissors, cut 4 x 1.7m (66.9”) lengths and 28 x 1.2m (47.2”) lengths (skip this step if you have purchased the kit).

Line the 1.7m lengths together and fold them in half to mark the middle so you don’t lose it.
I used a needle on a corkboard, but you can use whatever you have to hand.
You can do this without keeping it in place just take it slow and make sure your cord remains in the same position otherwise you’ll lose the length from the bottom.

Make a square knot.
Start this by using the left cord first, then the right. Make sure you’re always creating this knot using the left cord first to keep the pattern consistent.
If you don’t know how to create a square knot, use this guide first before continuing.
Repeat 5 more times.

Turn it around and finish off the square knots on the other side.
Repeat 6 more times.
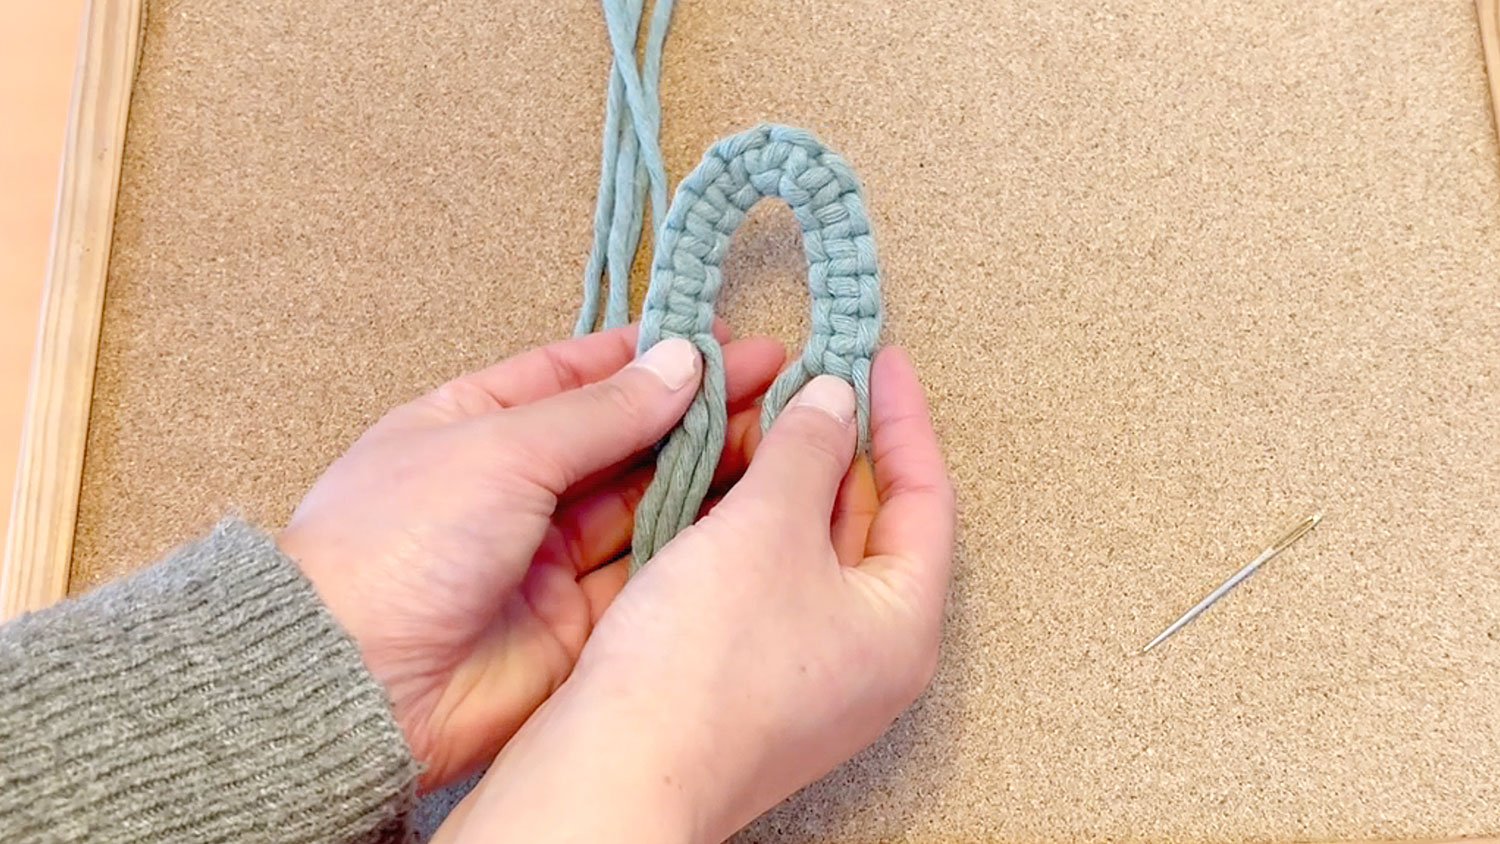
Count the square knots, you should have 12 and a half. Fold it over into a rainbow shape and check the ends to make sure that they are relatively still aligned.
If you have a cord length that is significantly shorter than the rest then you’ll need to redo it.
Set it aside for later.

2. Make the Square Knot Lengths
Grab two of the 1.2m lengths and align them together.
Fold them in half and place one over the other.

Create a square knot.
Ensure you keep hold of the top section so it doesn’t move around as you make the square knot. This will ensure the lengths remain of equal length.
Pull tightly and reposition the knot to the top as you make it.
Repeat this 13 times with the rest of the 1.2m lengths. You will end up with 14 in total.

3. Make the Basket Body
Take a square knot length and place it in between the handle.
Part the handle length into two, so you can create a square knot on each side to attach the length to the handle.

Then add the other lengths to the other side of the handle. It doesn’t matter which side you add them to as you’ll connect it together at the end.
Repeat this until you have added all lengths.
I’m using a cork board for filming purposes, but if you’d rather continue to knot on your lap or hang it up, then feel free to do so.
Try a position that makes it easier for you.

Connect it together by making one more square knot.

Continue the pattern of square knots until you have 12 rows of square knots.
I find it easier to hang it up on this section, but it’s up to you if you’d prefer not. I used a clothes rail so I can create the rows and walk around the basket instead of having to reposition it when needed.

4. Make the Basket Base
Split into 4 sections by counting 4 square knots for each section.
Then make a row of 3 square knots below, then 2, and then 1 knot. Repeat this for the other 3 sections.
Turn the basket inside out.

Connect the sections by creating a square knot at the top in between the two sections. Pull tightly. The inner cords will be your filler cords. Place the outer cords towards the top to get them out of the way.
Use cords from the left and right side to create another square knot. Keep pulling tightly on all these knots.
Repeat with the rest of the cord in that section.

Mark out the filler cord with an overhand knot as these will be used later.
It can be easy to miss a cord whilst forming the base especially when you get to the last section. If you need to mark out which cords to use for each section, do so. Or, keep checking to see you’ve included all the cords.
Repeat with the other 3 sections. You will start to see the base of the basket form.

Untie the overhand knots from the filler cords. You’re going to create one big square knot.
Take the bottom and top cord and fold them over side by side to create a loop. Use your finger to keep the loop in place.

Then using both cords from the left and right sides, create a square knot. Don’t pull too tightly at first.
Then close the loop by pulling tightly on the filler cords and tighten up the big spare knot.

Using fabric scissors, cut the excess lengths leaving around 1cm in length.

Now you can turn the basket outside in.
Use your hand to push down and shape the bottom of the basket.

And you’re all done!
Let me know in the comments below how you got on and what you use it for.